Collaborative workflow
Git(Hub)’s Guts
To clean code smells collaboratively, GitHub provides three extra functions: issues, branches, and pull requests.
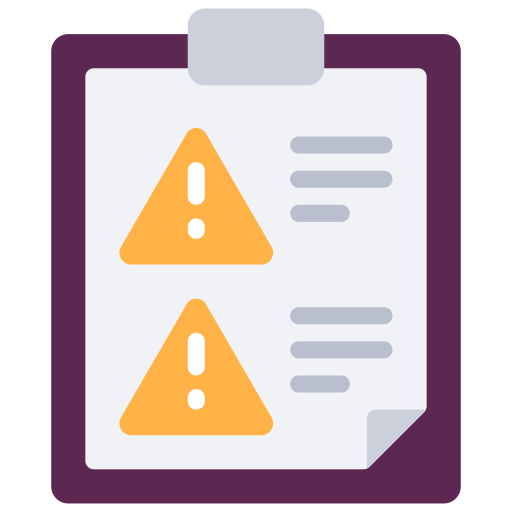
Issue
A tracked record of something that needs attention — a bug, an improvement, or a question

Branch
A safe copy of the code where changes can be made without touching the in-use version

Pull Request
A request to merge your changes into the in-use version — with a built-in review step
Issues: Tools to track what needs fixing
Issues are GitHub’s built-in way to track bugs, tasks, and improvements.
Every issue has:
- A title — short and specific
- A description — what is wrong, where, and what the expected behaviour is
- An (optional) label — e.g.
bug,enhancement,good first issue - An (optional) assignee — who is responsible for fixing it
In Practice
A senior team member has reviewed the repository and flagged some issues.
3.4 Using the provided ISSUES.md, create at least one GitHub issue in the manuscript repository — include a label, title and description
3.5 Review the repository yourself — can you spot anything else?
3.6 Record one additional code smell as a new issue
Branches: main and many more
branch is a copy of the codebase where you can make changes without affecting the in-use version.
So far, everyone has been working directly on the main branch — the default live version of the code.
With collaborators, unprotected main means:
❌ Two people editing the same file at the same time creates conflicts
❌ Half-finished changes breaking things for everyone
❌ No way to review work before it goes live
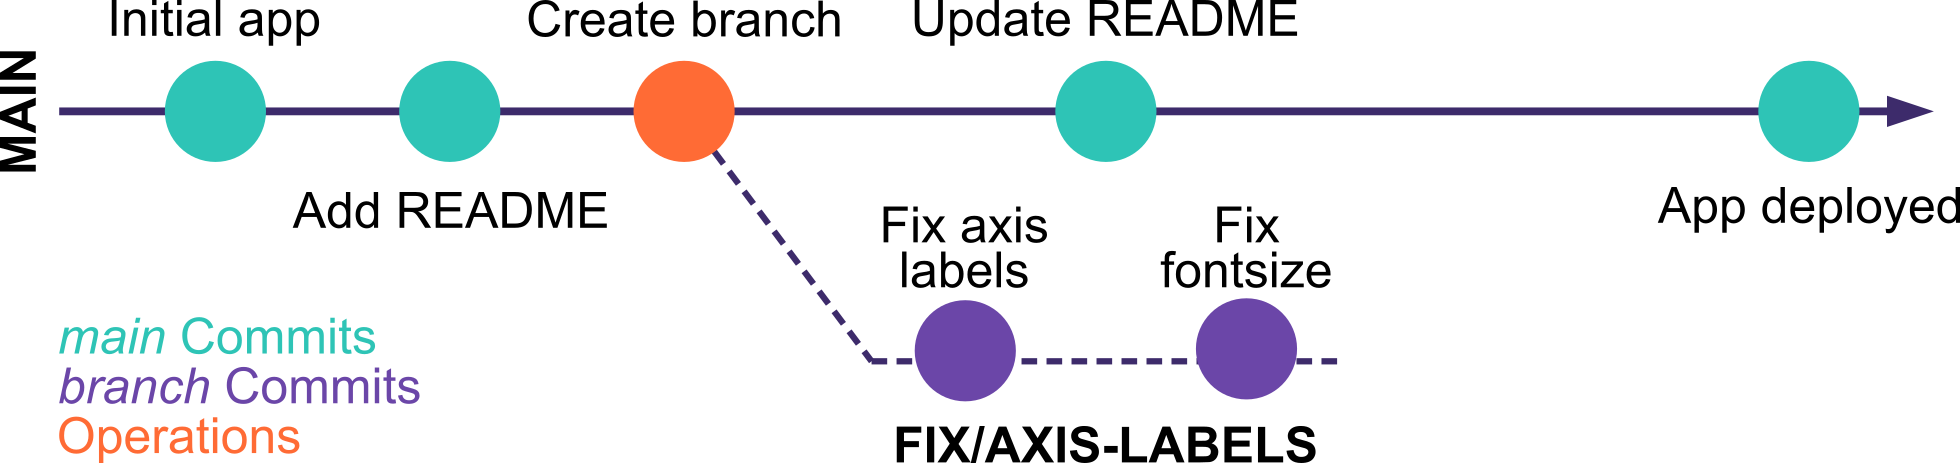
Branches: The workflow
- Open the Source Control tab (
Ctrl+Shift+G) - Click the branch name in the bottom-left status bar
- Select Create new branch — name it
fix/issue-number-short-description - Make your changes and commit as normal
- Click Publish Branch in the Source Control tab
- In the Git tab (top-right), click the branch icon 🔀
- Click New Branch — name it
fix/issue-number-short-description - Make your changes and commit as normal (stage → message → Commit)
- Click Push (↑) to push your branch to GitHub
fix/3-axis-labels or fix/5-hardcoded-path. The issue number makes it easy to trace back.
In Practice
3.7 On GitHub, assign yourself to one of the open issues
3.8 In your IDE, create a new branch for your fix — name it fix/<issue-number>-short-description
3.9 Make your changes, commit with a clear message, and push the branch to GitHub
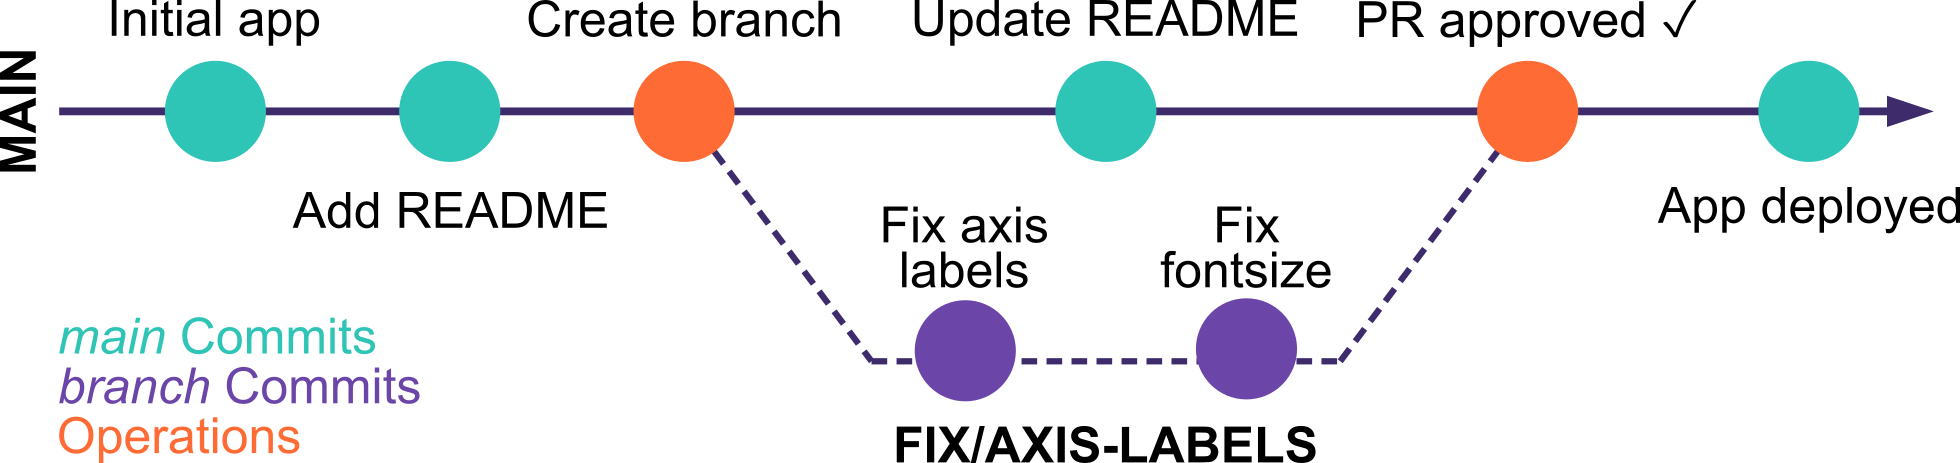
Pull Requests: The review loop
When your branch is ready, you open a pull request (PR) — a request to merge your changes into main. A PR lets your teammates:
- See exactly what changed, line by line
- Leave comments on specific lines
- Approve the changes — or ask for revisions
- Merge once everyone is happy
Pull Requests: Workflow
- After pushing your branch, go to the repository on GitHub
- GitHub will show a banner:
Compare & pull request— click it - Add a descriptive title
- In the description, link to the issue by typing
#followed by the issue number - Assign a teammate as reviewer
- Click
Create pull request
- Go to the
Pull requeststab - Click the PR you want to be reviewed
- On the right sidebar, click
Reviewers→ select a teammate (or yourself)
- Open the repository on GitHub to the
Pull requeststab - Open the PR you have been assigned to review
- Click
Files changedto see the diff — green lines are additions, red are deletions - Click the
+next to any line to leave an inline comment - When done, click
Review changes→ choose:- ✅
Approve— looks good, ready to merge - 💬
Comment— feedback, but no verdict yet - ❌
Request changes— needs fixes before merging
- ✅
- Once ready → click
Merge pull request
If there are merge conflicts, GitHub will prevent merging and show which files are affected
The author of the PR (or anyone with write access) can resolve conflicts by:
- Clicking
Resolve conflictson GitHub and editing the file in the browser,
OR
- Pulling the branch locally, fixing the conflicts in an IDE, committing, and pushing the resolved version back to GitHub
- Clicking
Once conflicts are resolved, the PR can be merged as normal
In Practice
3.10 Via GitHub, open a pull request for your branch — link it to the issue and assign a teammate as reviewer
3.11 Review a teammate’s PR — read the diff carefully, leave at least one comment, then approve
3.12 Once your own PR is approved, merge it — then watch the manuscript update live!
Quick reference
| Add a collaborator | Settings → Collaborators → Add people |
| Create an issue | Issues tab → New issue → add label + assignee |
| Create a branch (VSCode) | Click branch name in status bar → New branch |
| Create a branch (RStudio) | GitHub → Branches → New Branch |
| Push a branch | VSCode: Publish Branch | RStudio: Push (↑) |
| Open a pull request | Push branch → GitHub banner → Compare & pull request |
| Link PR to an issue |
Type #issue-number in the PR description
|
| Review a PR | Pull requests tab → Files changed → Review changes |
| Merge a PR | Approve → Merge pull request → Confirm |